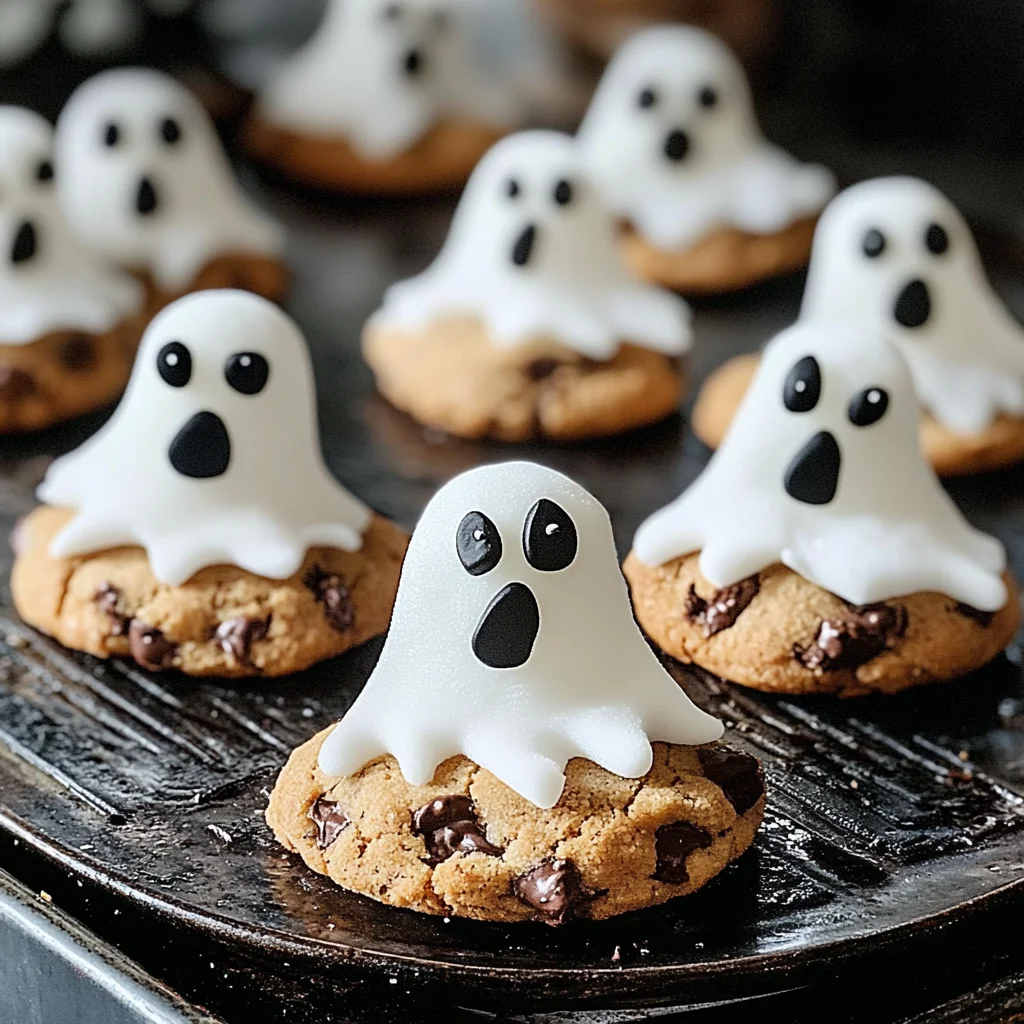
Ghost cookies
Ghost cookies are a delightful treat that adds a spooky twist to your Halloween festivities. These easy-to-make cookies are not only fun to create but also perfect for parties, school events, or just a cozy night in. With their adorable ghostly appearance, they are sure to bring smiles to both kids and adults alike. Let’s dive into this quick recipe that turns ordinary cookies into frightfully delicious delights!
Why You’ll Love This Recipe
- Quick and Easy: This ghost cookies recipe requires minimal time and effort, making it perfect for last-minute Halloween treats.
- Fun for All Ages: Decorating these cookies is an enjoyable activity for kids and adults, allowing everyone to unleash their creativity.
- Versatile Treats: Ideal for Halloween parties, school events, or simply as a sweet surprise at home.
- Deliciously Sweet: The combination of chocolate chunk cookies and marshmallows creates a delightful flavor that everyone will love.
- No-Bake Required: These ghost cookies can be made without any baking, which means no need to heat up the oven.
Tools and Preparation
To make your ghost cookies, you’ll need a few essential tools. Having the right equipment will make the process smoother and more enjoyable.
Essential Tools and Equipment
- Mixing bowl
- Baking sheet
- Parchment paper
- Spatula
Importance of Each Tool
- Mixing bowl: A good mixing bowl is essential for combining your icing sugar and decorating your ghost cookies effectively.
- Baking sheet: Perfect for laying out your decorated cookies without making a mess, ensuring easy transport.
- Parchment paper: Prevents sticking and makes cleanup effortless when handling the cookies.
- Spatula: Helps in transferring the decorated ghost cookies to your serving platter without breaking them.
Ingredients
To create these spooky treats, gather the following ingredients:
For the Ghost Cookies
- 175g icing sugar
- 1 x 200g pack chocolate chunk cookies
- 9 vegan marshmallows (regular size)
- black writing icing
How to Make Ghost Cookies
Step 1: Prepare Your Workspace
Start by setting up your workspace with all your tools and ingredients laid out. Cover your baking sheet with parchment paper to prevent sticking.
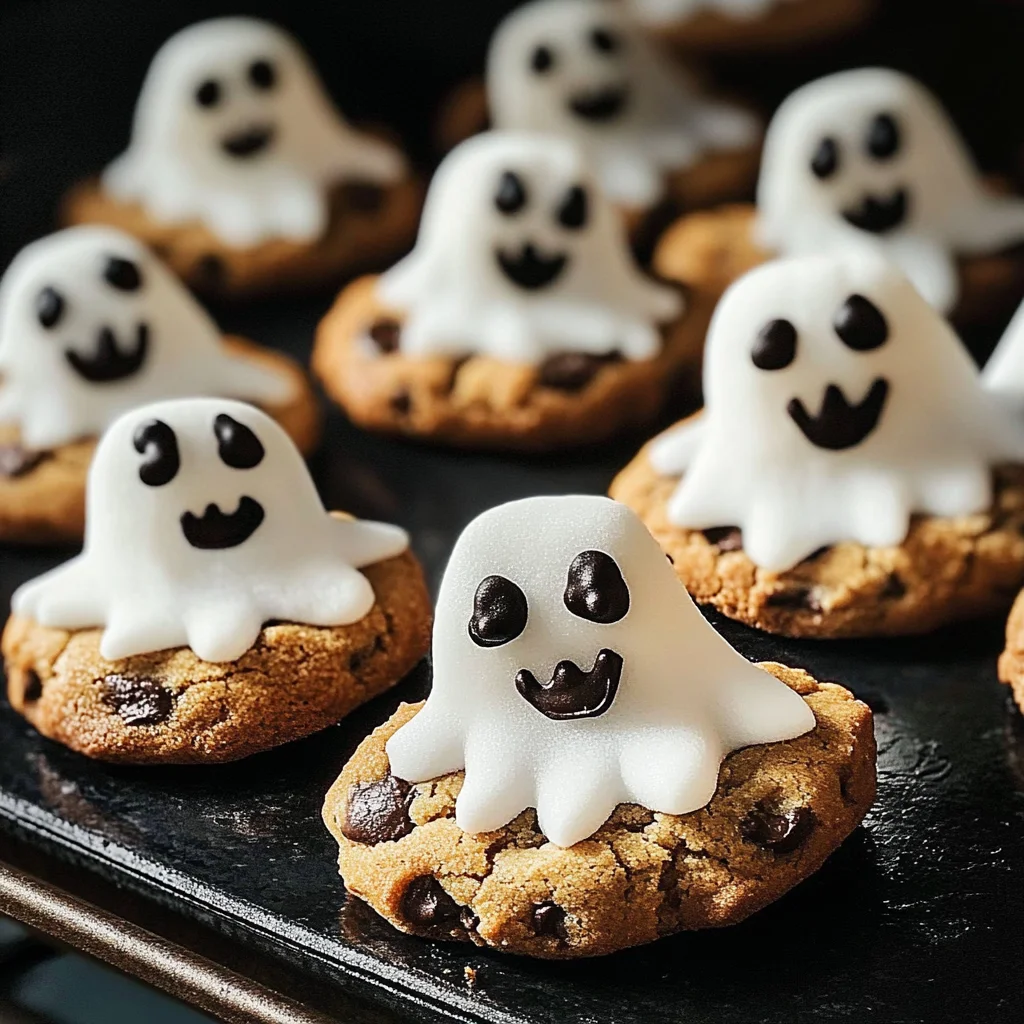
Step 2: Create the Ghostly Faces
- Place each chocolate chunk cookie on the parchment-lined baking sheet.
- Take a vegan marshmallow and cut it in half horizontally; this will serve as the ghost’s head.
- Position the cut side of each marshmallow on top of each cookie.
Step 3: Decorate with Icing Sugar
- In a mixing bowl, combine icing sugar with a small amount of water to create a thick frosting.
- Use a spatula or knife to spread the icing over each marshmallow until they’re covered evenly.
Step 4: Add Faces with Black Icing
- Using black writing icing, draw eyes and mouths on each ghostly treat.
- Let your creations sit for a few minutes so the icing can set before serving.
Now you have delicious ghost cookies ready to delight everyone! Enjoy these spooky treats at your next gathering or simply as an entertaining dessert at home.
How to Serve Ghost cookies
Ghost cookies are a fun and festive treat perfect for Halloween celebrations. They can be enjoyed on their own, or paired with delightful accompaniments that enhance their spooky appeal.
With Hot Chocolate
- Rich and creamy hot chocolate complements the sweetness of ghost cookies perfectly, making for a cozy treat.
On a Halloween Dessert Table
- Arrange ghost cookies among other Halloween-themed treats for an eye-catching display that will impress your guests.
As Party Favors
- Package individual ghost cookies in clear bags tied with orange ribbons as delightful party favors for your guests to take home.
With Ice Cream
- Serve ghost cookies alongside a scoop of vanilla or pumpkin ice cream for a sweet and creamy dessert experience.
How to Perfect Ghost cookies
To make your ghost cookies truly stand out, consider these helpful tips to ensure they turn out just right.
- Use fresh ingredients: Ensure your chocolate chunk cookies are fresh for the best flavor and texture.
- Cut marshmallows evenly: Use kitchen scissors to cut marshmallows into even pieces so they resemble ghosts accurately.
- Decorate with care: Take your time when using black writing icing to achieve spooky yet cute facial expressions on the marshmallows.
- Chill before serving: Let the decorated cookies chill in the fridge for about 10 minutes before serving. This helps set the icing and makes them easier to handle.
Best Side Dishes for Ghost cookies
Ghost cookies make a delightful dessert on their own, but pairing them with tasty side dishes can elevate your Halloween gathering. Here are some excellent side dish ideas:
- Pumpkin Spice Cupcakes
Moist cupcakes flavored with pumpkin spice and topped with cream cheese frosting create a festive addition to any dessert table. - Caramel Apple Slices
Fresh apple slices dipped in creamy caramel provide a refreshing contrast to the sweetness of ghost cookies. - Spooky Fruit Salad
A mix of seasonal fruits like oranges, grapes, and blackberries can add color and healthiness to your dessert spread. - Chocolate Dipped Pretzels
Crunchy pretzels coated in rich chocolate offer a sweet-and-salty combination that pairs well with ghost cookies. - Candy Corn Parfaits
Layered candy corn, whipped cream, and crushed graham crackers create eye-catching parfaits that celebrate Halloween colors. - Pumpkin Soup Shots
Serve small cups of creamy pumpkin soup as an appetizer that sets the mood before indulging in desserts like ghost cookies.
Common Mistakes to Avoid
Making Ghost cookies can be fun, but there are common pitfalls to watch out for.
- Boldly measure your ingredients: Not measuring icing sugar accurately can lead to overly sweet or dry cookies. Use a kitchen scale for best results.
- Avoiding the chocolate chunk: Skipping chocolate chunks will reduce flavor. Ensure you use quality chocolate chunk cookies for the best taste.
- Neglecting marshmallow placement: Placing marshmallows incorrectly can ruin the ghost shape. Position them carefully on each cookie before decorating.
- Overdoing the decoration: Too much black icing can overwhelm the cookies. Keep designs simple for a more appealing look.
- Ignoring cooling time: Decorating warm cookies can cause the icing to melt. Always let cookies cool completely before adding any toppings.
Storage & Reheating Instructions
Refrigerator Storage
- Store Ghost cookies in an airtight container in the refrigerator.
- They will stay fresh for up to 5 days.
Freezing Ghost cookies
- Place Ghost cookies in a freezer-safe bag or container.
- They can be frozen for up to 3 months.
Reheating Ghost cookies
- Oven: Preheat to 350°F (175°C) and heat for about 5-7 minutes until warm.
- Microwave: Heat one cookie at a time for 10-15 seconds on medium power.
- Stovetop: Place a cookie in a non-stick skillet over low heat, cover, and warm for about 2-3 minutes.
Frequently Asked Questions
What are Ghost cookies?
Ghost cookies are spooky Halloween treats made from chocolate chunk cookies decorated with marshmallows and black icing, perfect for festive gatherings.
How long do Ghost cookies last?
Ghost cookies can last up to 5 days when stored properly in an airtight container in the refrigerator.
Can I customize my Ghost cookies?
Absolutely! You can add different colors of icing or use various types of candies to create unique designs that suit your style.
Are there alternatives to chocolate chunk cookies for Ghost cookies?
Yes! You can use any cookie base you like, such as oatmeal or peanut butter, as long as they hold their shape well during decorating.
How do I make vegan Ghost cookies?
Simply ensure that the chocolate chunk cookies and marshmallows used are vegan-friendly, and follow the same decorating instructions.
Final Thoughts
Ghost cookies are not only delicious but also a creative way to celebrate Halloween. Their versatility allows you to customize decorations based on personal preferences or party themes. Try these delightful treats for your next gathering and impress your guests!
Ghost Cookies
Get ready to delight your family and friends with these whimsical Ghost cookies, the perfect spooky treat for Halloween! These easy-to-make cookies combine the rich taste of chocolate chunk cookies with the fun and festive spirit of ghostly decorations. With just a few simple ingredients and no baking required, you can create these adorable desserts that are sure to be a hit at any gathering. Whether you’re hosting a Halloween party or looking for a fun activity with the kids, decorating these ghostly delights will unleash everyone’s creativity. Enjoy them as a sweet snack or packaged as party favors to bring smiles all around!
- Prep Time: 15 minutes
- Cook Time: 0 minutes
- Total Time: 15 minutes
- Yield: Approximately 9 ghost cookies 1x
- Category: Dessert
- Method: No-Bake
- Cuisine: American
Ingredients
- 175g icing sugar
- 200g chocolate chunk cookies
- 9 vegan marshmallows (regular size)
- Black writing icing
Instructions
- Prepare your workspace by laying out all tools and ingredients. Line a baking sheet with parchment paper.
- Place each chocolate chunk cookie on the baking sheet. Cut the vegan marshmallows in half horizontally and place the cut side down on each cookie.
- In a mixing bowl, combine icing sugar with a little water to make thick frosting. Spread this icing over each marshmallow until covered evenly.
- Use black writing icing to draw eyes and mouths on each ghostly treat. Let them sit for a few minutes until the icing sets.
Nutrition
- Serving Size: 1 cookie (35g)
- Calories: 150
- Sugar: 18g
- Sodium: 70mg
- Fat: 6g
- Saturated Fat: 3g
- Unsaturated Fat: 3g
- Trans Fat: 0g
- Carbohydrates: 24g
- Fiber: 0g
- Protein: 1g
- Cholesterol: 0mg